Hub documentation
How to configure SAML SSO with Google Workspace
How to configure SAML SSO with Google Workspace
In this guide, we will use Google Workspace as the SSO provider and with the Security Assertion Markup Language (SAML) protocol as our preferred identity protocol.
We currently support SP-initiated and IdP-initiated authentication. For user provisioning, see SCIM.
This feature is part of the Team & Enterprise plans.
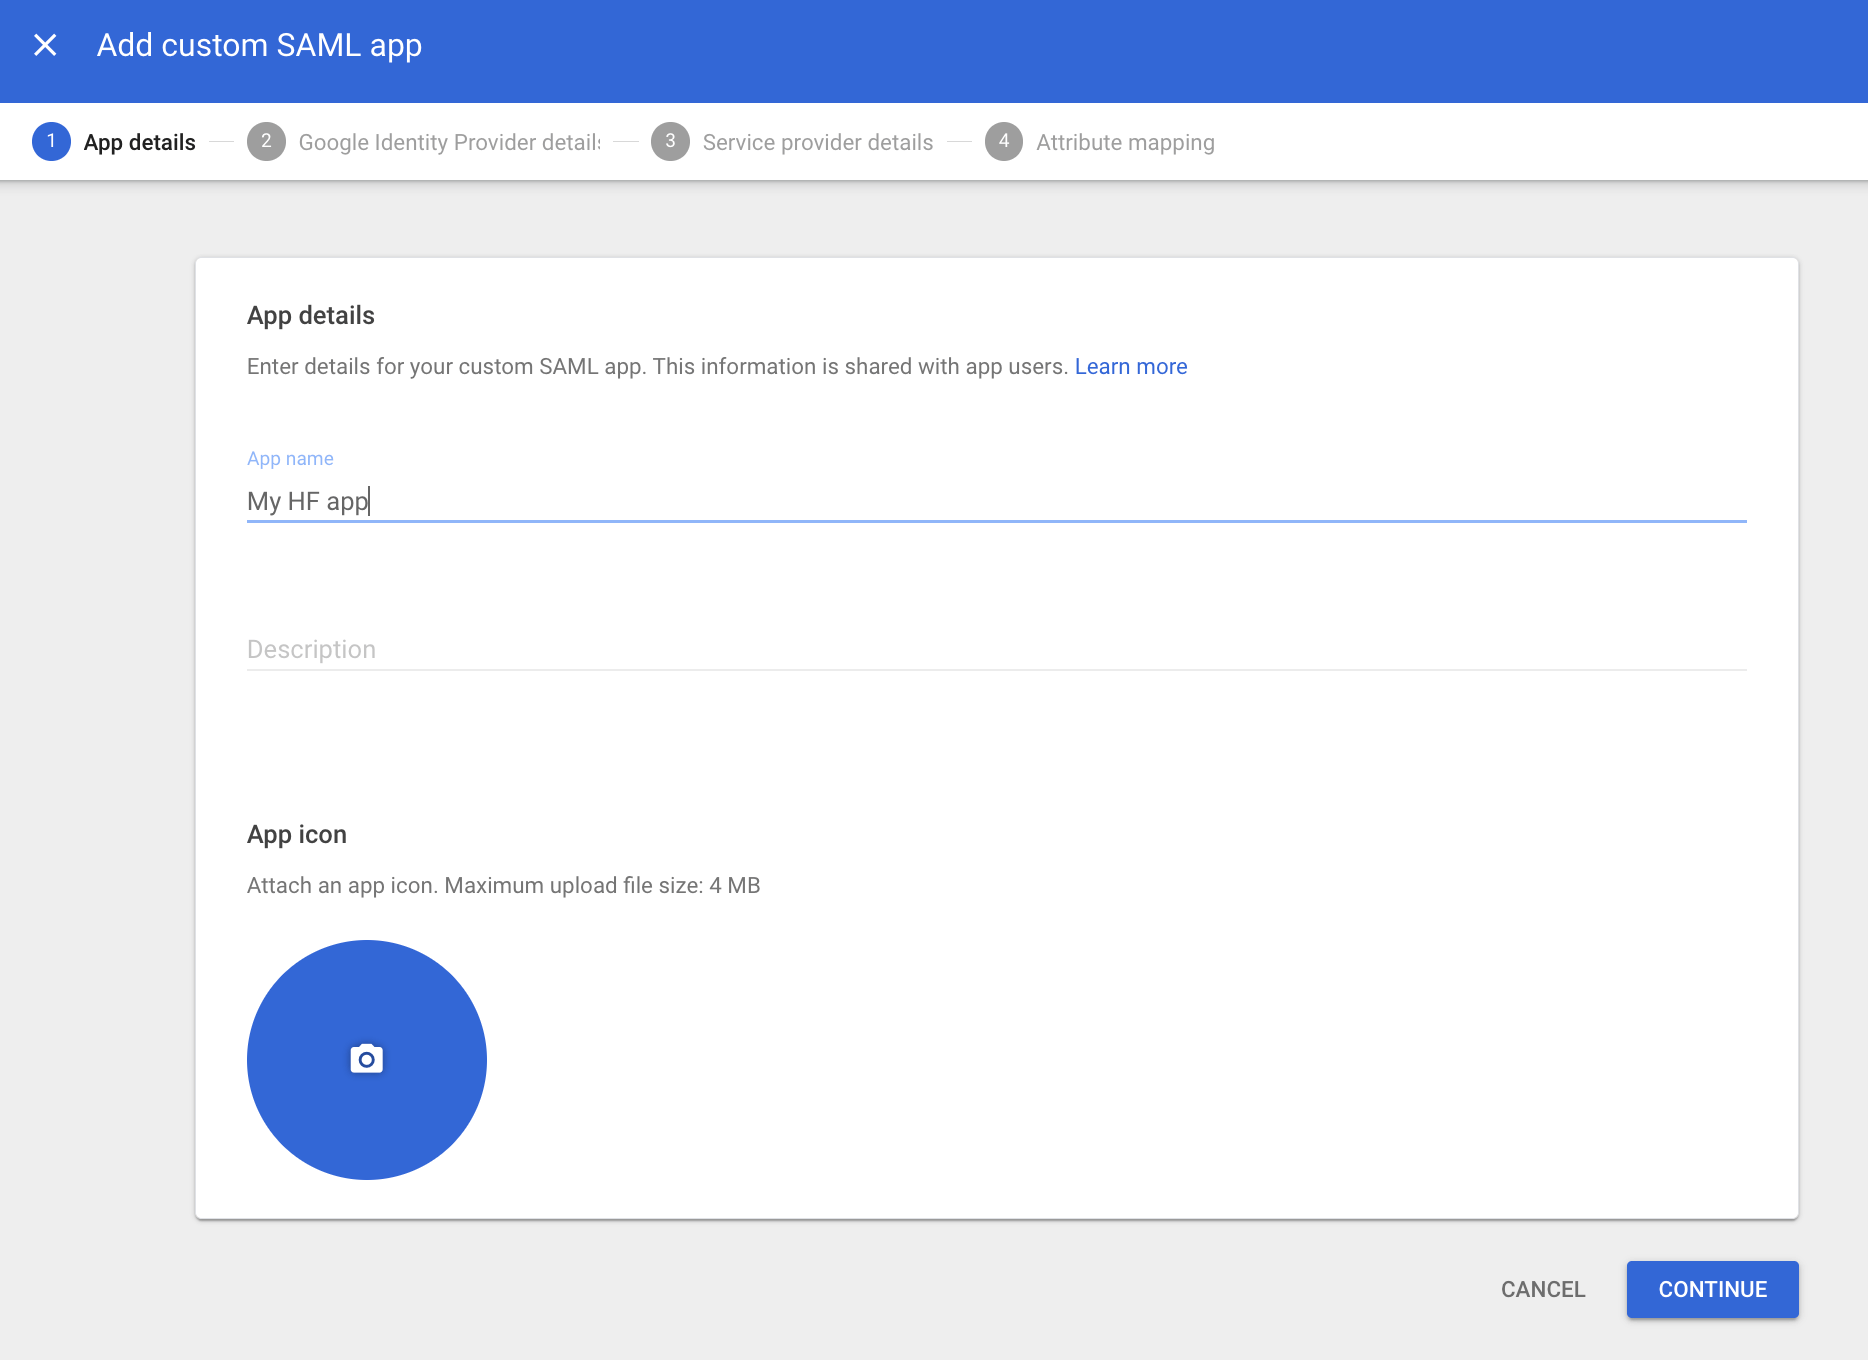
Step 1: Create SAML App in Google Workspace
- In your Google Workspace admin console, navigate to
Admin>Apps>Web and mobile apps. - Click
Add appand thenAdd custom SAML app. - You must provide a name for your application in the “App name” field.
- Click
Continue.

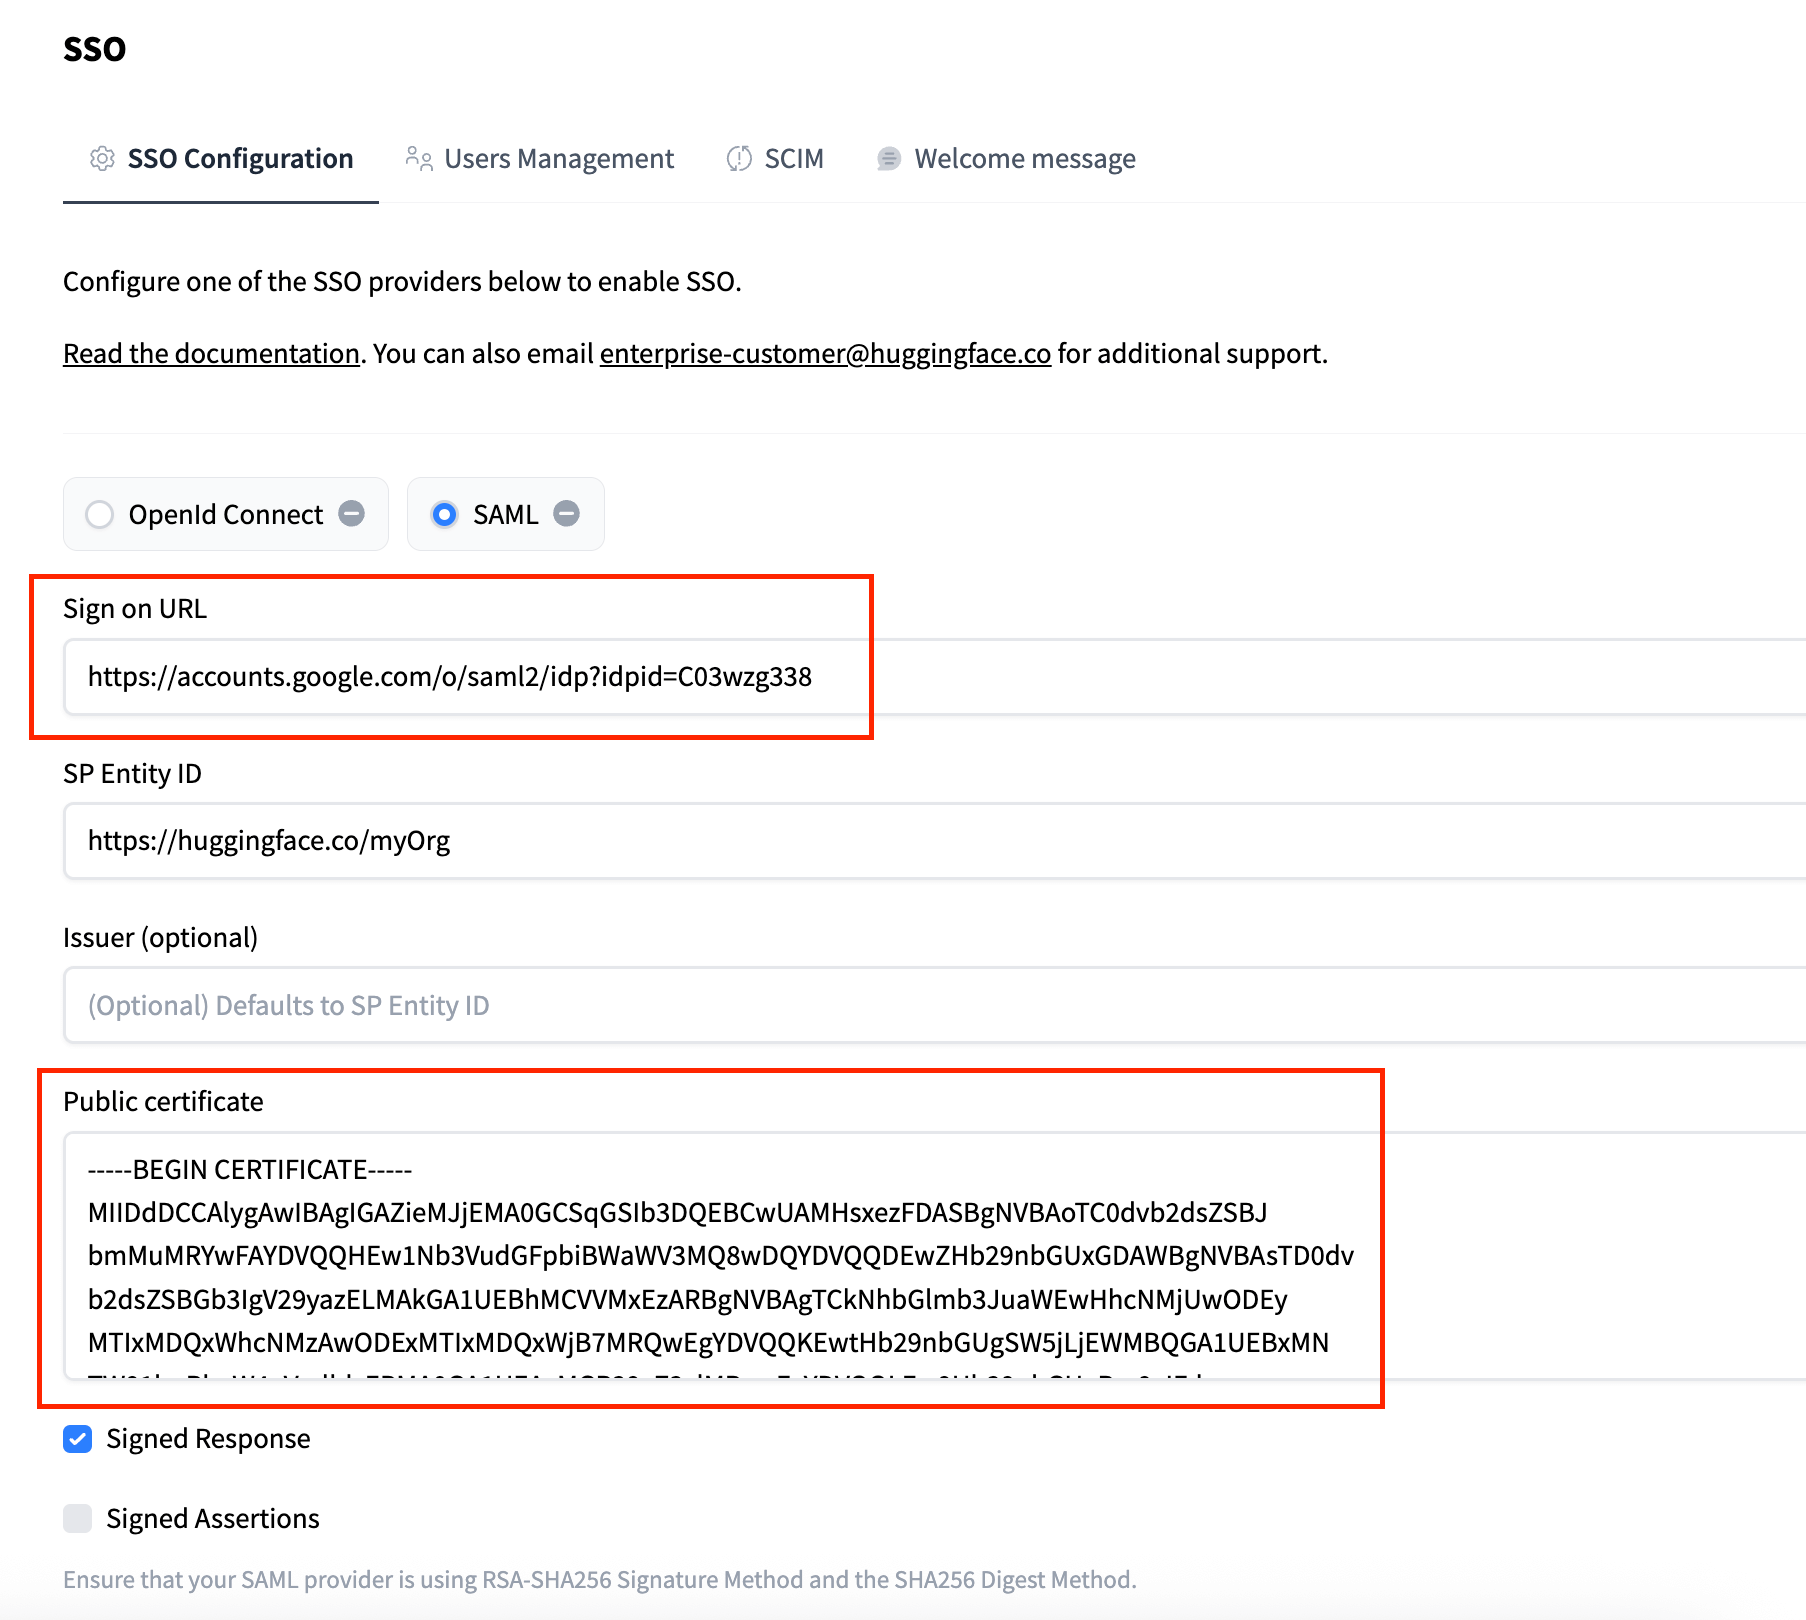
Step 2: Configure Hugging Face with Google’s IdP Details
- The next screen in the Google setup contains the SSO information for your application.
- In your Hugging Face organization settings, go to the
SSOtab and select theSAMLprotocol. - Copy the SSO URL from Google into the Sign-on URL field on Hugging Face.
- Copy the Certificate from Google into the corresponding field on Hugging Face. The public certificate must have the following format:
-----BEGIN CERTIFICATE-----
{certificate}
-----END CERTIFICATE-----

- In the Google Workspace setup, click
Continue.
Step 3: Configure Google with Hugging Face’s SP Details
- In the “Service provider details” screen, you’ll need the
Assertion Consumer Service URLandSP Entity IDfrom your Hugging Face SSO settings. Copy them into the correspondingACS URLandEntity IDfields in Google. - Ensure the following are set:
- Check the Signed response box.
- Name ID format:
EMAIL - Name ID:
Basic Information > Primary email
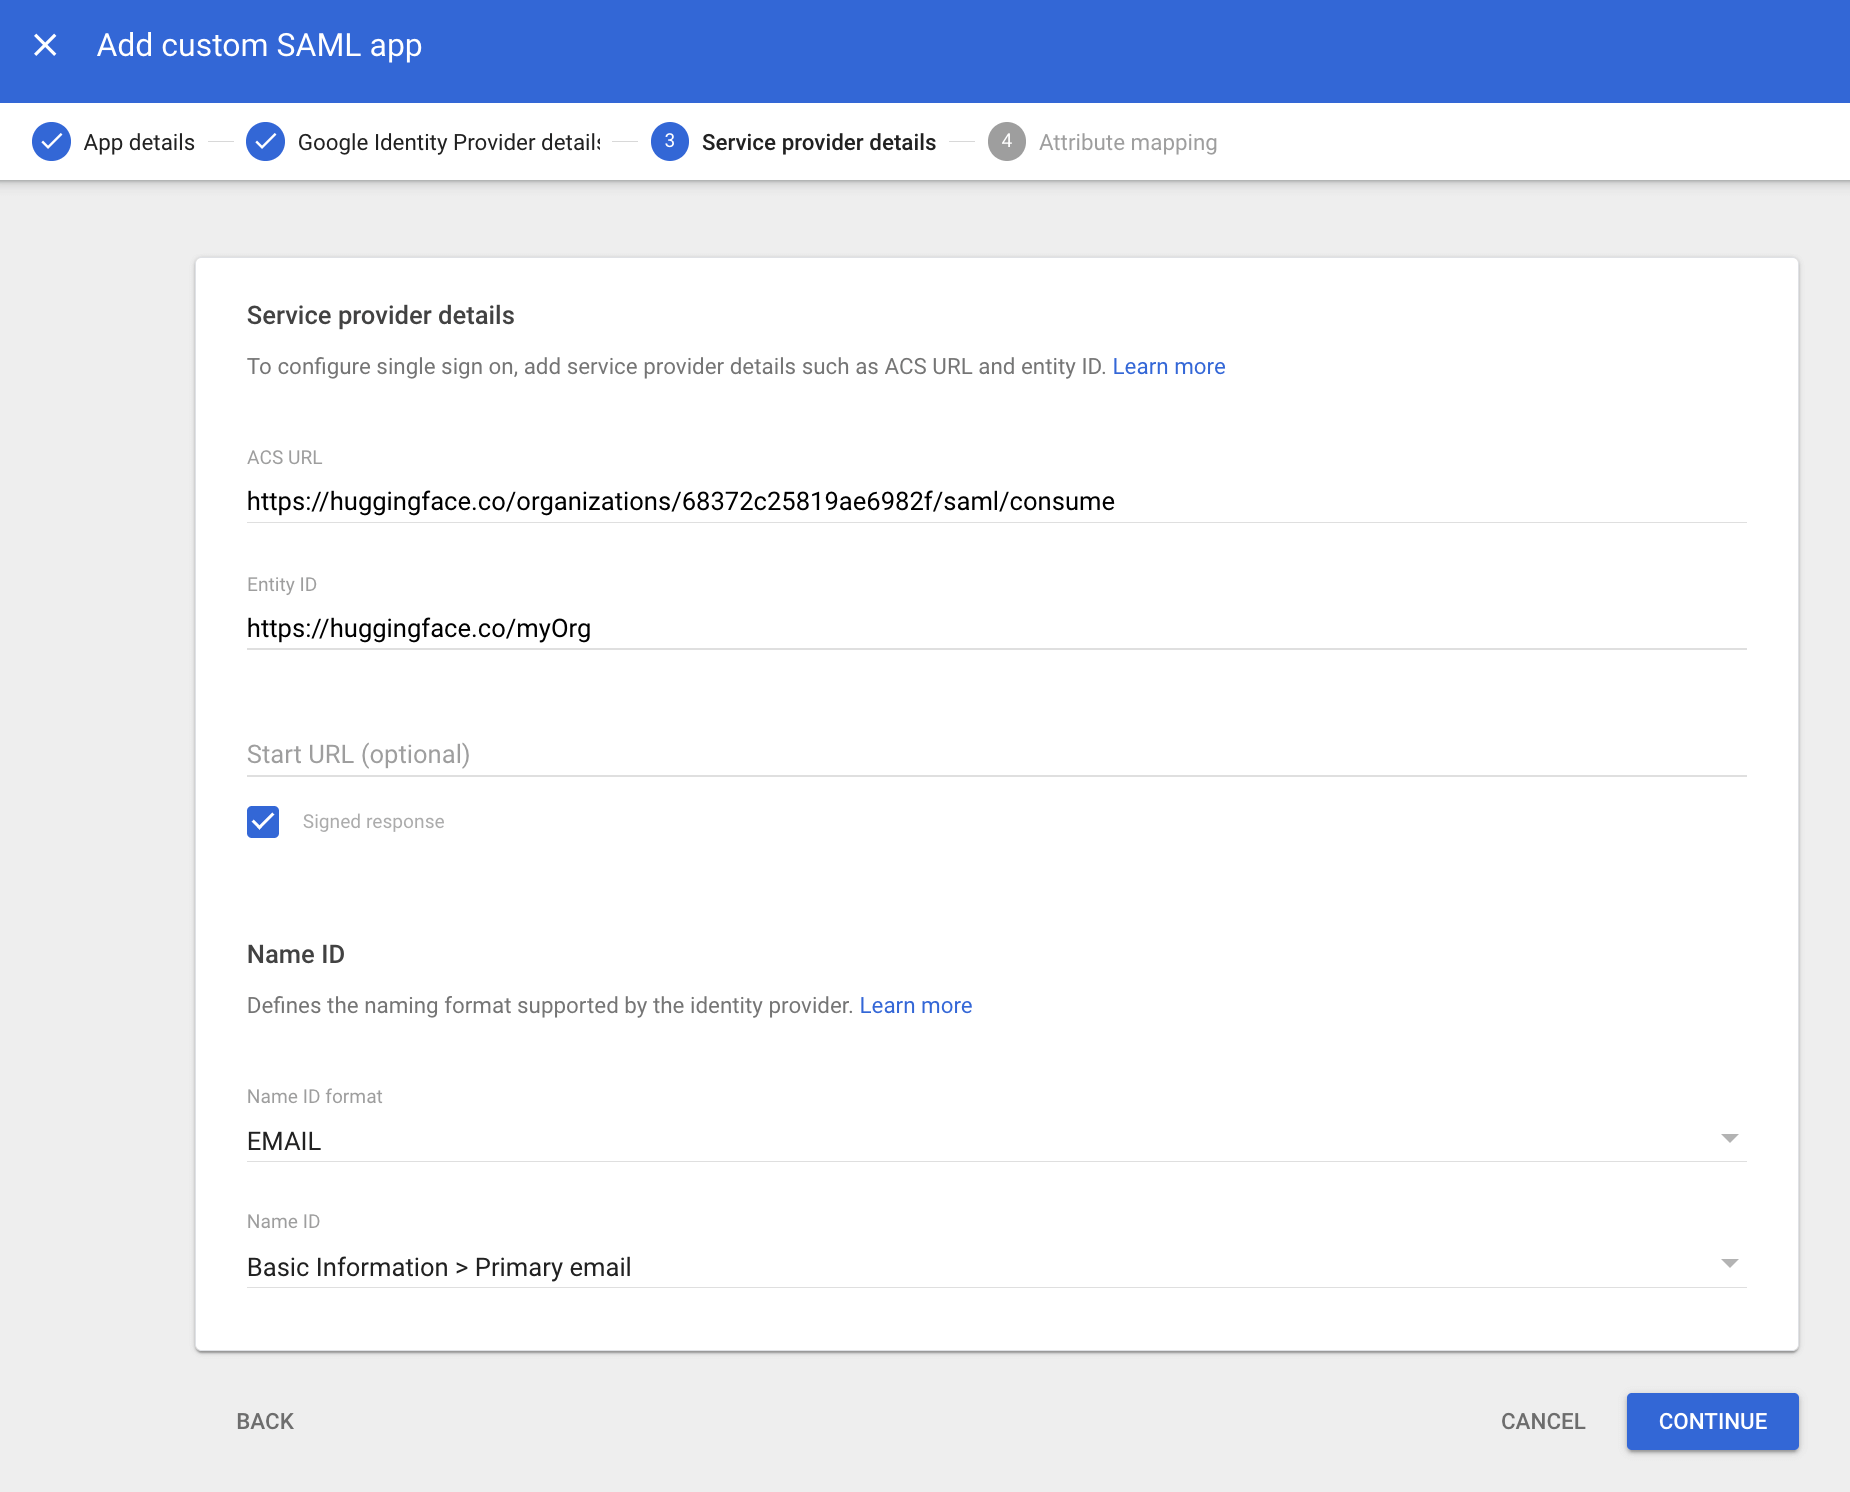

- Click
Continue.
Step 4: Attribute Mapping
- On the “Attribute mapping” screen, click
Add mappingand configure the attributes you want to send. This step is optional and depends on whether you want to use Role Mapping or Resource Group Mapping on Hugging Face.

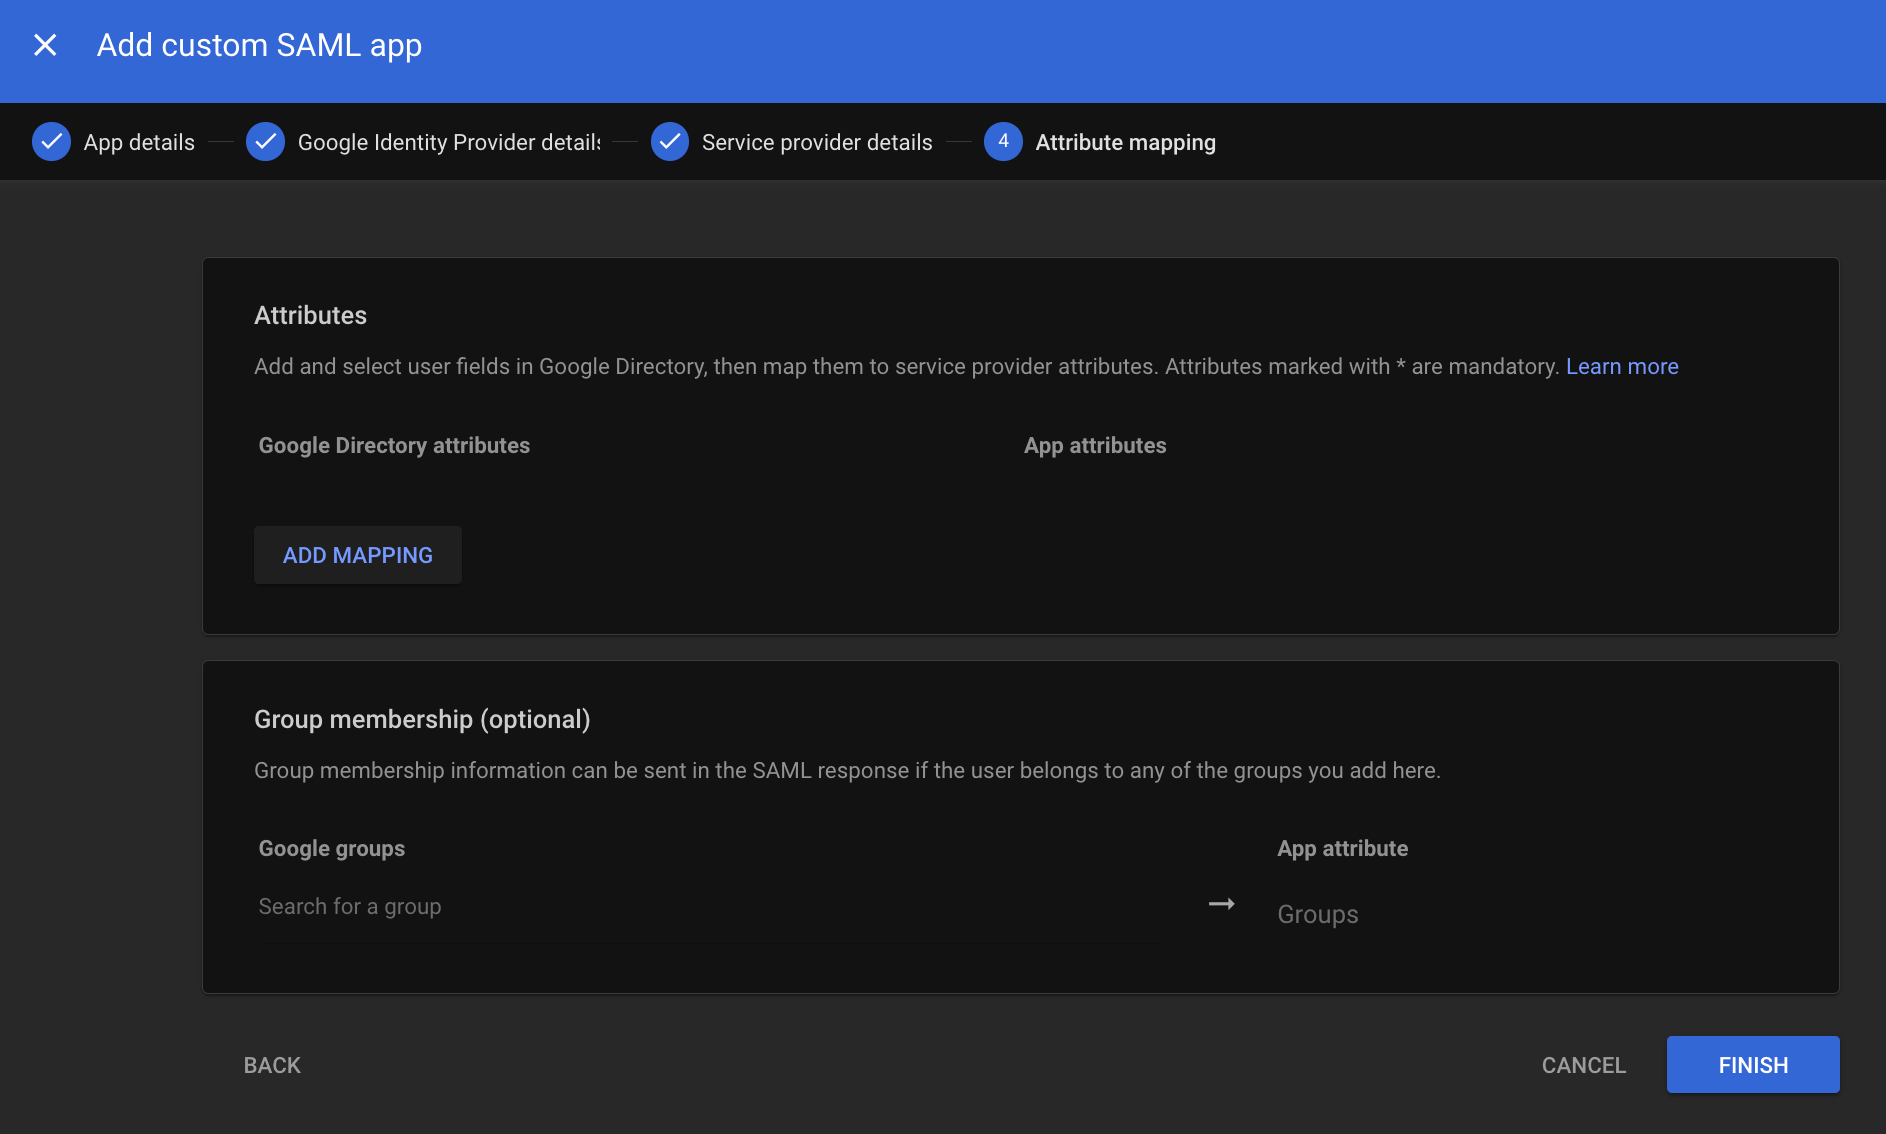
- Click
Finish.
Step 5: Test and Enable SSO
Before testing, ensure you have granted access to the application for the appropriate users in the Google Workspace admin console under the app’s “User access” settings. The admin performing the test must have access. It may take a few minutes for user access changes to apply on Google Workspace.
- Now, in your Hugging Face SSO settings, click on “Update and Test SAML configuration”.
- You should be redirected to your Google login prompt. Once logged in, you’ll be redirected to your organization’s settings page.
- A green check mark near the SAML selector will confirm that the test was successful.
- Once the test is successful, you can enable SSO for your organization by clicking the “Enable” button.
- Once enabled, members of your organization must complete the SSO authentication flow described in the How it works section.